Lets get started.
1) Creating the Axapta Service Account.
This is basically creating an Axapta User Account and an Employee Account to match it. The important things to remember here are that the account must have the necessary permissions to do whatever work you intend your extension to do. In my case, I needed it to be able to do everything basically and that is still possible while complying with any Sarbanes or Security policy your company adheres to. Team up with with administration and have them use whatever password policy and retention policies are in place. You will just need the resulting configuration file in the next sections.
2) Configure the Axapta Business Connector
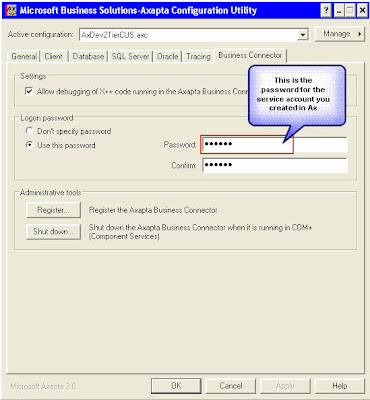
Using the Axapta Configuration Tool, and a working configuration, select the Business Connector tab and specify the password of the Axapta Service account you created. Click "Register.." when completed.
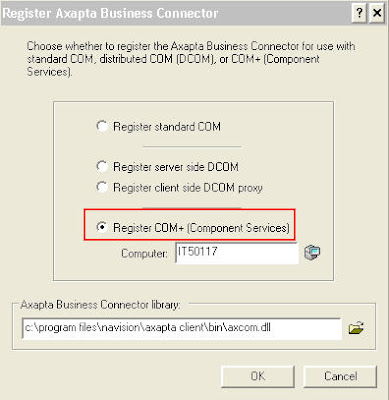
3) Register the Business Connector as COM+
4) Configure Component Services.
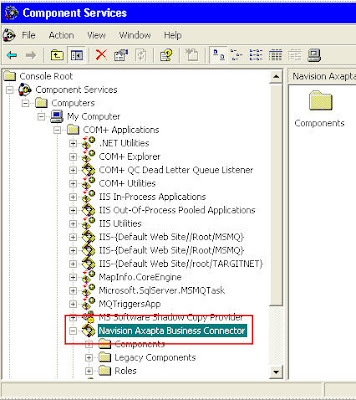
Navigate to Administrative Tools >> Component Services. Now bring up the Properties panel of the "Navision Axapta Business Connector" component.
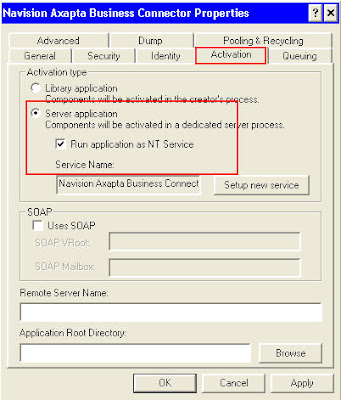
Go to the Activation tab and select "Server Application" and also the "Run application as NT Service" check box. Running our business connector as a service allows us to manage it like an NT service, which is crucial to stability in our findings. We need windows to control this COM component because, left to it's own management, it gets real flaky and unreliable. If any of you have found differently, I would love to hear it, but in my world COM is just junk and is just waiting for a chance to blow up and let me down.
 5) Set up and Start your new Axapta Business Connector NT Service.
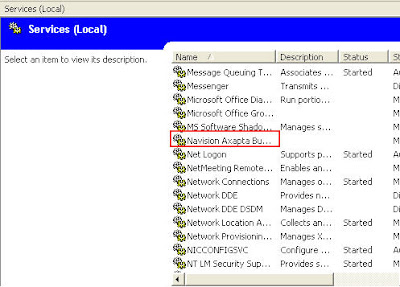
Navigate to Administrative Tools >> Services, or just use the Services snap in that opens with Component Services if your already there. This is where we want to set the startup type and also the security on the service. Open the properties window.
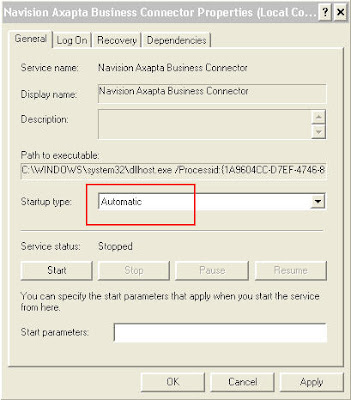
 On the General tab, select "Startup Type" Automatic, so that your Business Connector service will start by itself when the server is bounced.
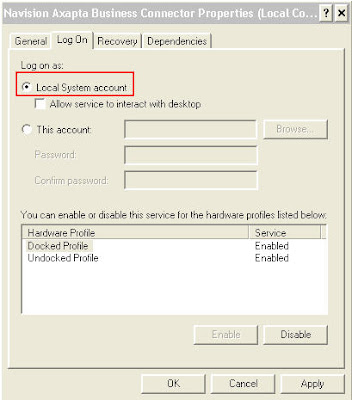
From the "Log On" tab, select "Local System Account". I have used both a real NT service account as well as local system. It seems to work fine with no issues as local system, but your network domain policies may differ from mine. It should work fine, but season to taste for your environment.
Now just start the service and check the Event Log for any errors, there should be none. As an NT service, we can monitor the health of our COM component and also see information about cache clears, logins, and lots more. All from where we manage our other Non Axapta services. Thats the real bonus. We get the stability of an NT service and centralized management. Win Win!
As always, this doesn't mean this is Microsoft's way, or that they endorse it, just that they certainly gave us the options to do it like this. In my book, if they don't say no, you can try it.
At this point, you should have a happy, healthy, Axapta Business Connector NT service, ready to handle requests from our Data Layer, which we will get into in the next segment. Talk to you soon.
Thanks,
H
No comments:
Post a Comment